Showing posts with label organic. Show all posts

Monday, November 14, 2016

Frog Gigging: How To and Recipe


By Team member Courtney Schnitzler

I remember spending my summer evenings as a child walking around the pond with a dollar store flashlight, a gig, and my buddy Molly.


When I visited my hometown on college breaks, I found myself doing the exact same thing at night.


Now that I’m married and living in a new town, I ask locals where good gigging spots are. They either A) look at me like I’m a crazy person because they’ve never considered doing that, or B) they tell me how long it’s been since they’ve gigged and say they wouldn’t have a clue where to go. Why is frog gigging becoming a lost art?
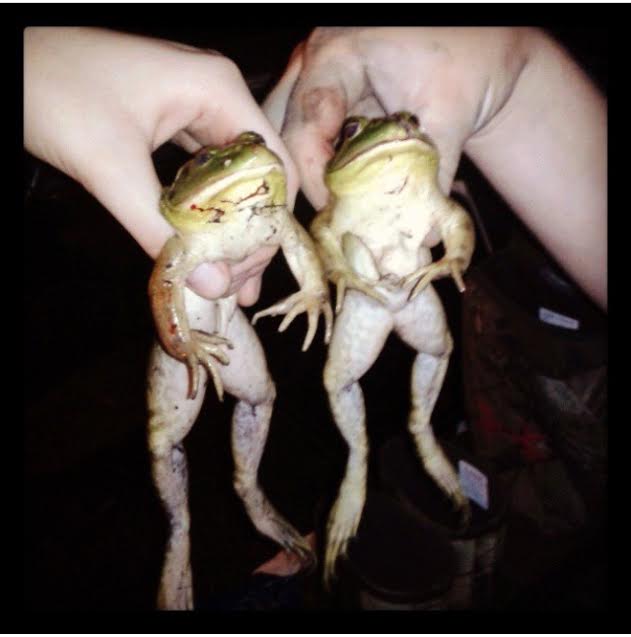


What frogs?


Bull frogs. Big ones! 


Where to gig?


Frogs like mud, tall grass and still, murky water. If you want to find big bull frogs, look near ponds or lakes surrounded by grass. If you scare them, they’ll jump into the water and bury themselves in the mud a few feet from where they just sat. If there are rocks along the shallow edges of the pond or lake, they won’t have any mud to jump in, so you probably won’t find them in rocky water.


How to gig? 


All you need is a flashlight and a long pole with a pronged end; however, this is something you really want a friend with you for. Typically, one person holds the flashlight and collects frogs while one does the gigging. Make sure your light is really bright, and can be focused in on a small zone. Shine the flashlight along the edge of the water/surrounding dirt ahead of you about 10 yards until you see a little yellowish-green reflective glow. Frogs eyes reflect light like other animals do. Once you’ve caught the glow in your flashlight, try to keep it as you walk quietly towards the frog. Extend the gig towards the frog, without breaking the beam of light (with yourself or the gig) and quickly stab it in the main body or head (you don’t want to mess up the leg meat). 


Cleaning the frog


Frogs have tough skin but really loose bodies so it’s easiest to use scissors to cut right above the hips. Now, grab the skin at the hips with some pliers and the hip bone with your other hand and peel the skin down the legs, much like skinny jeans. Lastly, cut the feet off right above the webbed portion. 


My favorite recipe: 


I like to separate the legs, so they are easier to handle in the pan. I soak them in buttermilk or eggs while my oil is heating up, then I drop them into a powder mixture of: flour, corn meal, pepper, salt, garlic, and onion powder. If you want more of a Cajun style taste, add in some cayenne and paprika. I use just enough seasoning so I can smell it in my dry mix.

After I drop my frog legs into the dry mix, I set them on a plate for a few minutes to give the mix time to stick on good. I like to roll them in the dry mix one more time, in hopes of getting a little more mix to stick (because I love the crispy coating).

Fry until golden brown, drain on a paper towel, and enjoy!


Monday, February 15, 2016

Spaghetti Squash with Venison Meatballs - Recipe

By Liz Adams, Huntress View team member


Ingredients

-Spaghetti Squash

For Meatballs:

-1 pound ground venison
-1/2 cup Italian style bread crumbs
-1/4 cup milk 
-1/2 teaspoon salt
-1/2 teaspoon Worcester sauce 
-1/4 teaspoon pepper
-1/4 cup finely chopped onion 
-1 egg*
(*I used egg whites instead of an actual egg but If you want to use an egg you only need 1 if you want to use egg whites then it will be 3 tablespoons to equal 1 egg)

Directions

For Squash:

-Cut squash in half
-Take a spoon and deseed 
-Put cut side down into a baking dish and add a little bit of water to the pan. 
-Place in oven and cook for 30 minutes. If you want it to be a little softer instead of el dente cook for 45 minutes.

For Meatballs:

-Mix all ingredients together in a bowl. 

-In a baking dish put aluminum foil sprayed with cooking spray down and place meatballs about 1 inch apart. 

-Place in oven and bake for 20 minutes. Depending on how large you make the meatballs you may have to cook them a little longer. 

-Top off with pasta sauce and favorite cheese. 

Tuesday, November 3, 2015

Buttermilk Fried Quail Recipe

By Andrea Haas


This October I went on my very first quail hunt. We ended up with 12 total, just enough for a meal! I've never had quail before so I experimented with it and tried it a couple of different ways to see how I like it. The recipe is intended for the whole quail breast, but we cut the meat off of the bone on a few and fried them that way, similar to nuggets. I personally preferred it that way, my husband liked it left on the bone (which is definitely easier and quicker). If you decide to make these into nuggets, use less oil and don't fry them as long. Once they are floating in the oil & golden brown, they are done.


Ingredients

-8 to 16 quail breasts
-2 cups buttermilk
-2 Tablespoons Italian Seasoning
-2 teaspoons paprika
-1 Tablespoon garlic powder
-1 teaspoon ground white pepper
-2 cups flour
-1 Tablespoon salt
-3 cups vegetable oil

Instructions

Mix the buttermilk with all of the spices (except the salt). Dip the quail in the mixture and then set in a covered container for 1-8 hours.


When you are ready to fry, pour the oil in a large pan - I prefer a 10" cast iron pan - and heat over medium-high heat. You'll want enough oil so that it almost submerges the quail breasts.

Meanwhile, take the quail out of the buttermilk and let it drain in a colander. Don't shake the colander, just set the quail in it and leave it there.


Test the oil temperature by sprinkling a little flour into it. When it's ready, the flour will immediately sizzle.

Pour the flour and salt into a plastic baggie and shake to combine. Put a few of the quail into the bag and shake to get it coated in flour. Fry for about 4 to 5 minutes on one side. Turn the quail over and fry for another 3 to 4 minutes. You will probably fry in batches, so leave the unfried quail in the colander until you're ready to coat them in flour and fry them. You don't want the floured pieces to sit and soak up the flour.


When the quail are fried, set them on a cooling rack set above paper towels to drain away excess oil. 

Here's the finished product! It would go perfect with biscuits & gravy!