Showing posts with label recipes. Show all posts

Tuesday, November 29, 2016

Hunter Gatherer Game Dinners Review

By Andrea Haas


One of the most rewarding parts of harvesting an animal is feeding yourself and your family, so you want to make sure you enjoy eating your wild game and reap the full benefits of your harvest. Hunter Gatherer Game Dinners has dinner kits available for the game or fish that you harvested yourself or for the meat you buy from the grocery store, and it's simple and easy to make. All you have to do is provide the meat and a few ingredients, and Hunter Gatherer Game Dinners provides the rest!

I recently tried the dinner kit called "Seared Venison with Red Wine Chocolate Sauce and Wild Rice with Cranberries" and to say it was delicious is an understatement! This kit is available on the Hunter Gatherer Game Dinners website for only $13!

Below are my results:


What's Included: 

-There are pre-measured packets of seasonings, each labeled with a number
-Olive Oil
-Step-by-step instructions that break down what "number" of seasonings to add and when
-Parchment Paper Bag 
-Wild Rice w/Cranberries for the side dish
-A shopping list describing what you'll need to purchase (see below)


What You'll Need:

 
-12 oz. Venison, Filet Mignon or Rib Eye Steak. (I used Filet Mignon from a doe that I
harvested this rifle season.)
-2 oz. Pancetta or American bacon (I left this out since the Filet Mignon is wrapped in bacon) 
-1 stick or 4 Tbsp. Unsalted Butter
-14.5 oz of Low Sodium Chicken Broth
-1 bottle of fine Red Wine - Cabernet Sauvignon or Pinot Noir


How to Prepare: 

-Included in the dinner kit is step-by-step instructions on how to prepare both the side of Wild Rice with Cranberries and your venison.


Step 1 - Prep Meat

Step 2 - Prepare Wild Rice (Stove Top)


Step 3 - Sear Meat


Step 4 - Place Steak in Parchment To Cook

Step 5 -  Prepare Sauce


Step 6 - Add cup of broth to the (Additional Instructions included on kit)

Step 7 - Remove Steak From Oven and Serve


Additional Info

-Serves 2

-Each dish takes 30-40 minutes
-A unique side dish is included in all dinner kits
-The dinners are health conscious: high in fiber, low fat & low sodium.
-Preservative free
   

My Overall Impression

My husband and I both LOVED this dinner kit! I used chicken broth to cook the rice in instead of water, but I feel it would be great either way. The rice had a bit of a nutty flavor and the cranberries complimented the rice perfectly! This meal kit would be perfect for a wild game Thanksgiving or Christmas dinner.

If you're a picky eater, don't let the words "chocolate sauce" scare you. I don't feel it had a strong chocolate flavor, just a hint of the cocoa powder that was included, which complimented the red wine. Trust me, it has an amazing flavor that I'm sure even finicky eaters would love.

It didn't take me long to make this and it really was simple, thanks to the easy to follow instructions and the pre-measured ingredients. The cost of the other ingredients you'll have to purchase is minimal and they may actually be something you keep on hand in your pantry or fridge anyways. 

If you're looking for a new way to prepare your venison, I highly recommend you trying this dinner kit from Hunter Gatherer Game Dinners. Also, make sure you check out their other dinner kits, including "Cedar Plank Game Hen with Porcini Quinoa", "Cedar Plank Salmon with Moroccan Couscous and Sultanas and "Cedar Plank Pork with Farro Risotto" just to name a few! 

For more information please visit their website: http://huntergatherergamedinners.com

Monday, November 14, 2016

Frog Gigging: How To and Recipe


By Team member Courtney Schnitzler

I remember spending my summer evenings as a child walking around the pond with a dollar store flashlight, a gig, and my buddy Molly.


When I visited my hometown on college breaks, I found myself doing the exact same thing at night.


Now that I’m married and living in a new town, I ask locals where good gigging spots are. They either A) look at me like I’m a crazy person because they’ve never considered doing that, or B) they tell me how long it’s been since they’ve gigged and say they wouldn’t have a clue where to go. Why is frog gigging becoming a lost art?


What frogs?


Bull frogs. Big ones! 


Where to gig?


Frogs like mud, tall grass and still, murky water. If you want to find big bull frogs, look near ponds or lakes surrounded by grass. If you scare them, they’ll jump into the water and bury themselves in the mud a few feet from where they just sat. If there are rocks along the shallow edges of the pond or lake, they won’t have any mud to jump in, so you probably won’t find them in rocky water.


How to gig? 


All you need is a flashlight and a long pole with a pronged end; however, this is something you really want a friend with you for. Typically, one person holds the flashlight and collects frogs while one does the gigging. Make sure your light is really bright, and can be focused in on a small zone. Shine the flashlight along the edge of the water/surrounding dirt ahead of you about 10 yards until you see a little yellowish-green reflective glow. Frogs eyes reflect light like other animals do. Once you’ve caught the glow in your flashlight, try to keep it as you walk quietly towards the frog. Extend the gig towards the frog, without breaking the beam of light (with yourself or the gig) and quickly stab it in the main body or head (you don’t want to mess up the leg meat). 


Cleaning the frog


Frogs have tough skin but really loose bodies so it’s easiest to use scissors to cut right above the hips. Now, grab the skin at the hips with some pliers and the hip bone with your other hand and peel the skin down the legs, much like skinny jeans. Lastly, cut the feet off right above the webbed portion. 


My favorite recipe: 


I like to separate the legs, so they are easier to handle in the pan. I soak them in buttermilk or eggs while my oil is heating up, then I drop them into a powder mixture of: flour, corn meal, pepper, salt, garlic, and onion powder. If you want more of a Cajun style taste, add in some cayenne and paprika. I use just enough seasoning so I can smell it in my dry mix.

After I drop my frog legs into the dry mix, I set them on a plate for a few minutes to give the mix time to stick on good. I like to roll them in the dry mix one more time, in hopes of getting a little more mix to stick (because I love the crispy coating).

Fry until golden brown, drain on a paper towel, and enjoy!


Monday, November 30, 2015

Smothered Pheasant In the Dutch Oven - Recipe

By Andrea Haas


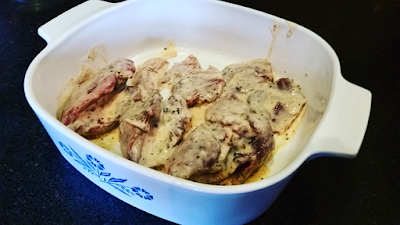
Sorry I didn't take better pictures while making this recipe. It was kind of an experiment, but it turned out to be one of my favorite ways to make pheasants. 
The original recipe I found on www.allrecipes.com, titled Smothered Pheasant. I used that recipe and added my own twist to it by adding different spices & seasonings. I also added the chopped green chiles, which I feel really made the recipe. You could also use mushrooms instead. Either way would be great! 
The original recipe calls for 6 pheasant breasts and 2 cups of half and half. I only used 3 breasts and I thought the 2 cups half and half was perfect for that amount. 

Ingredients

-6 skinless, boneless pheasant breast halves
-garlic salt and black pepper, to taste
-1/2 cup all-purpose flour
-1/2 cup butter
-2 cups half and half cream

Directions

-Preheat the oven to 325 degrees

-Add flour to a plate or bowl and mix in garlic salt and black pepper.I was pretty generous with the garlic salt. Press the pheasant breast into the flour until completely coated. Shake off excess flour and set aside.

-Melt the butter in a cast iron Dutch Oven over medium heat. Cook the pheasants in the hot butter until golden brown on both sides, about 5 minutes per side. Careful not to overcook.

-Pour in the half and half and bring to a simmer. Add chopped green chiles.

-Cover the Dutch Oven and bake in the preheated oven until pheasant breasts are tender and no longer pink, about 1 1/2 hours. I baked my 3 breasts for just an hour and they were done. 


Tuesday, November 3, 2015

Buttermilk Fried Quail Recipe

By Andrea Haas


This October I went on my very first quail hunt. We ended up with 12 total, just enough for a meal! I've never had quail before so I experimented with it and tried it a couple of different ways to see how I like it. The recipe is intended for the whole quail breast, but we cut the meat off of the bone on a few and fried them that way, similar to nuggets. I personally preferred it that way, my husband liked it left on the bone (which is definitely easier and quicker). If you decide to make these into nuggets, use less oil and don't fry them as long. Once they are floating in the oil & golden brown, they are done.


Ingredients

-8 to 16 quail breasts
-2 cups buttermilk
-2 Tablespoons Italian Seasoning
-2 teaspoons paprika
-1 Tablespoon garlic powder
-1 teaspoon ground white pepper
-2 cups flour
-1 Tablespoon salt
-3 cups vegetable oil

Instructions

Mix the buttermilk with all of the spices (except the salt). Dip the quail in the mixture and then set in a covered container for 1-8 hours.


When you are ready to fry, pour the oil in a large pan - I prefer a 10" cast iron pan - and heat over medium-high heat. You'll want enough oil so that it almost submerges the quail breasts.

Meanwhile, take the quail out of the buttermilk and let it drain in a colander. Don't shake the colander, just set the quail in it and leave it there.


Test the oil temperature by sprinkling a little flour into it. When it's ready, the flour will immediately sizzle.

Pour the flour and salt into a plastic baggie and shake to combine. Put a few of the quail into the bag and shake to get it coated in flour. Fry for about 4 to 5 minutes on one side. Turn the quail over and fry for another 3 to 4 minutes. You will probably fry in batches, so leave the unfried quail in the colander until you're ready to coat them in flour and fry them. You don't want the floured pieces to sit and soak up the flour.


When the quail are fried, set them on a cooling rack set above paper towels to drain away excess oil. 

Here's the finished product! It would go perfect with biscuits & gravy!